Copyright © 2021 Kinfast All rights reserved. 粤ICP备06034726号 Site Map Powered by iwonder.cn
- TEL: +86-755-8347-9123
- E-MAIL: info@kfproduct.com

Screw is small, Responsibility is big.
Screw is small, Responsibility is big.
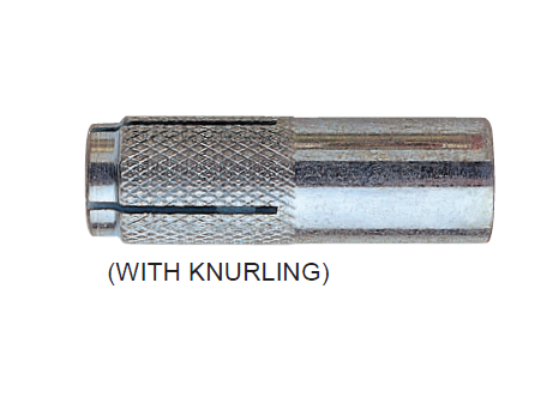
Drop-in anchors are concrete fasteners designed for use in solid concrete only. Once the fastener is set, it becomes permanent.
Drop-in anchors are sold under a variety of names, including: drop-in, female anchor, hdi, Hilti drop-in anchor, concrete drop-in anchor, sup-r-drop, HDI anchor, lip drop-in anchor, HDI-L anchor, HDI-P anchor, thunder drop, multi-set, concrete anchor, mini drop-in, and coil thread drop-in

There are many uses for drop-in tools, and the main advantage is that you can use them for bolts that can be removed periodically. Here are the top uses for drop-in anchors:
ü Drop-in anchors are used for managing cable trays, organizing HVAC systems, fire sprinklers, and more.
ü The anchors can be used for situations when you need a bolt that has to be inserted and removed regularly.
ü Drop-in anchors are exclusively used in solid concrete material.
ü An anchor set tool is required to secure the anchors in place.
The anchor sets in the concrete when the internal expander plug is pushed into the bottom of the anchor with a drop-in anchor setting tool. The plug causes the anchor to expand in the hole and is kept in place by friction.
The following is a 10-step process for installing drop-in anchors. If you have the tools mentioned above, you can get started immediately. It may take you a while to obtain the necessary tools in order to secure anchors onto handrails, machines, overhead hangers, lights, and more. Most anchors are suitable for heavy-duty fastening.
The 5 dimensions available are 1/4", 3/8", 1/2", 5/8", and 3/4". These can be found in zinc plated steel, 304 or 316 stainless, depending on the project’s needs. The fixture is removed after a successful installation and while the drop-in anchor is left in the concrete, the bolt itself can be removed by unscrewing it. Here's how to install drop-in anchors in 10 steps:
Step 1) Prepare the equipment. To get started, you need to have the anchor and the adequate masonry drill bit. The drop-in manufacturer should list the exact size hole you need to make to install the anchor.
Pro Tip: Research this information from the specific manufacturer of the anchors you're installing.
Step 2) Adjust the drill bit depth. The adjustment should be based on the hole you need to drill (after doing your research on depth). The depth should be adjusted on the hammer drill. Mark the area on the drill bit at the exact point you need to stop drilling, in order to drill an accurate hole.
Step 3) Switch your hammer drill to "hammer mode". The default mode will be "drill mode". Note: With certain setting tools, you don't need to do this.

Step 4) Put on your protective gear. You need to wear protective equipment before you start drilling. At this stage, you're getting ready to drill and you should protect your eyes and ears adequately.
Step 5) Start drilling in the marked point of the concrete. Keep drilling until you reach the required depth. The marking on the drill bit should indicate where you need to stop. Use the hammer drill to drill the hole and use a carbide drill bit for the drop-in anchor you're using. The drill bit size required should be listed on the drop-in anchor's manufacturer website.
Step 6) Clean up the hole with a vacuum. This is done in order to remove the debris from the area. Take the wire brush and use it to clean up debris that is stuck to the corners of the hole. Use the vacuum to re-vacuum a second time and make sure the hole is fully cleared of debris. Insert the setting tool and the hammer until the set tool and the anchor shoulder meet. Alternative: Get a blowout bulb instead of a vacuum because they work similarly.
Step 7) Start the anchoring process by dropping the anchor inside the hole. Make sure the opening of the anchor is facing the exit.
Step 8) Take the setting tool for the anchor and insert it at the top of the anchor. Proceed to hammer down on it until your setting tool touches the top of the anchor. The anchor should be fully secured in the hole.
Step 9) Once the anchor is secured, you can start attaching your fixtures to the concrete. Take the bolt and insert it in the hole. Secure the bolt in the hole by using a wrench to tighten it.
Step 10) Insert a threaded rod or bolt into the fixture. This is the final step once the fixture is over the drop-in anchor.
For more information about anchors or screws, please kindly contact us directly.


